
How To Use The Cricut Autopress: Easy Guide!
How To Use The Cricut Autopress? Want to learn how? Step-by-step instructions will be provided in this article on how to use the Cricut Autopress.
In this article, you’ll find out everything you need to know about using Autopress. From setting up your machine to pressing the perfect fabric prints, we’ll make sure that you have everything you need to get started. So read on and start creating those amazing projects today!
Credit: Sweetredpoppy
Here Are The 5 Best Selling Heatpress Machines This Year!
Products Ratings Price
Fancierstudio Digital Heat Press Machine 9.9/10 [Editor's Choice] Check Price
TUSY Heat Press Machine 9.8/10 Check Price
VEVOR 5 in 1 Combo Heat Press Machine 9.6/10 Check Price
Seeutek Heat Press 12" X 10" Machine 9.6/10 Check Price
TUSY 5 in 1 Heat Press Machine Pro 9.6/10 Check Price
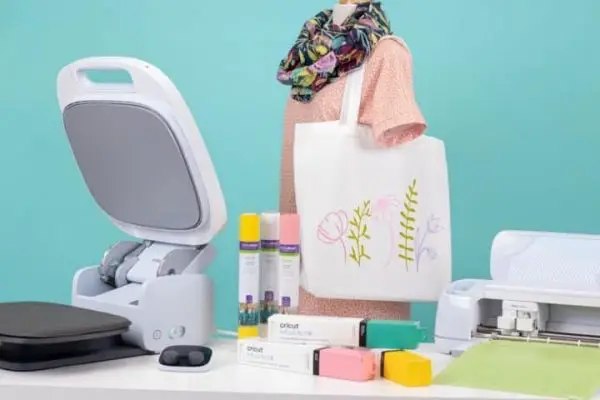
Have you ever wished you could print your unique designs on fabrics and wooden items right at home? Well, now there’s a new product on the market that will let you do just that – Cricut Autopress!
What is a Cricut Autopress?
It is a machine that prints designs on fabrics and wooden items. It is a fun, easy way to print unique pieces of art on your materials. You can print designs on clothes, home decor, and much more.
This nifty little machine is easy to use and makes printing fabric designs at home much easier than ever before. Take a look at our Cricut Autopress Review to learn more about its benefits and drawbacks if you’re interested in purchasing one for yourself!
Check out our article – Cricut Autopress Review: Smart Heatpress – Is It Worth It?
How To Use The Cricut Autopress? Step-by-Step Guide:
Do you love to print designs on fabric or wooden surfaces? If so, you’ll love the Autopress! The Autopress is a machine that prints beautiful designs on fabrics and wooden items using simple instructions. In this guide, we’ll teach you everything you need to know to get started with Autopress.
Materials Required:
- Cricut Autopress
- Cricut Machine
- Weeding Tool
- Standard Grip Mat
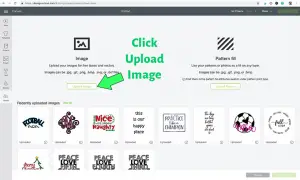
Step 1: Select Desired Image
You can simply go to your Cricut Design Space and click “upload image” and then click “browse” to find your file. You can also drag and drop the file or navigate to the file on your device and click your design to upload it to Cricut Design Space. On the “prepare to upload” screen, you can change the name and tag of the project, which can help to identify your file in the future.
Credit: SpecialHeartStudio
Now go back to the screen and choose the white upload button. Select the file from recent uploads that you want to print, and then choose “add to canvas” toward the top-right corner. Before beginning your design, Design Space will mechanically test it on your particular machine.
Step 2: Adjust the Dimensions
Next, adjust the dimensions of your design according to your requirements, such as for a shirt, fabric, or wooden item. When you click the “make it” button in the top-right corner, you’ll view your editing screen. If you’re working with Iron-On material, you need to select the “mirror” button. Finally, you can select the material you are using.
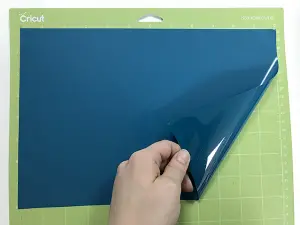
Step 3: Cut the Design
Put the shiny carrier face down on your Cricut mat after removing the clear liner from your Standard Grip Mat. The matte Iron-On mat should be faced up.
Credit: Siserna
Insert your mat into your Cricut machine by sliding it beneath the white guides and pressing the load button.
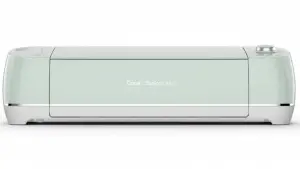
This Cricut Machine Below Is A Best-Seller:
Check Price on Amazon Check Price on Walmart
Then, press the blinking “play” button and your Cricut will begin its cut. Once you’re done cutting and completely satisfied, press the arrow button in order to release the Cricut Mat.
Step 4: Use the Weeding Tool
You can use a weeding tool for a more precise cut design.
Below Is A Great Weeding Tool That Works Perfectly

Check Price on Amazon Check Price on Walmart
If the remainder of your design requires intricate work, use your weeding tool to pierce the design on top of the carrier sheet, and gently peel it off.
Then, remove your Iron-On material from your Cricut Mat and trim away any excess carrier sheet.
Step 5: Adjust the Temperature
A key thing to remember is that each material has its own specific temperature needs. For example, some materials need a higher temperature to properly print while others can be printed at a lower temperature. Pay attention to the material and adjust your settings accordingly. There will be a list of temperature settings for different materials in the Cricut Autopress’s manual.
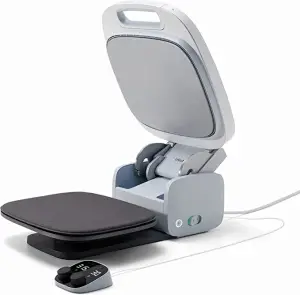
You can use control dials to adjust the temperature and time. With the help of these dials, the user can adjust the temperature and timer based on the material they are working with.
This can be especially helpful for those who have multiple types of materials that they want to print at the same time. Make sure to check that there are no Cricut autopress error codes.
What is an Error Code?
An error code indicates to a user that a malfunction has taken place, as well as identifies the specific error responsible for the issue. Cricut Autopress machine may display this code as part of an error message.
Your Cricut Autopress will show the error on your control pod like this:

Credit: Cricut
Whenever your Cricut Autpress’s control pod displays an error code, you should follow these steps:
- Turn off the Cricut Autopress by unplugging it.
- Wait a minimum of 30 seconds before proceeding.
- Reconnect and power on your Cricut Autopress.
- In the event that the error continues to occur after you have powered on and connected the Autopress, contact the Member Care department for further assistance.
By adjusting these settings, users can ensure that their cuts are accurate and consistent. Additionally, by setting timers, you can easily create timed projects.
The dial on the side of the machine lets you change the temperature in 5 increments, and one click will adjust the temperature in that increment.
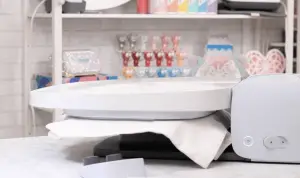
Step 6: Pre-heat Base Material
Before applying the transfer, it’s important to preheat the base material. This will remove wrinkles and ensure a flat pressing surface. It also removes any possible moisture from the surface which could negatively affect your transfer.

Credit: Sweetredpoppy
Step 7: Press-on the Design
Place your base material onto the machine’s plate and center it. Then, place your design on top, and arrange your design in the center.
Place the transfer about 3 inches below the base’s seam to have it adhere for the best effect. Press down on the carrier and transfer sheet with your fingers to smooth the transfer.
Place the pressing mat onto the Autopress plate and set the edges to one side with the metal plate. Verify that the Control Pod is set to the proper temperature and time.
Press down on the Autopress handle until it locks in place. The Control Pod will count down to zero, beep, and open the latch when pressing is complete.
Credit: SweetRedPoppy
As soon as your transfer has cooled, remove your carrier sheet to see your completed design!

Credit: SweetRedPoppy
Check This Video On Youtube To Learn How to Use the Cricut AutoPress
FAQs
1- Cricut autopress: where to buy it?
You can find the Cricut autopress at many retailers, including big box stores and online retailers. It is important to find a retailer that has a good return policy in case you are not satisfied with your purchase.
You can get the best deals here:
Check Price on Amazon Check Price on Walmart
2- In order to activate Cricut Autopress, what do I need to do?
You will need an internet connection and a Windows/Mac computer with a USB port. Your Mac computer requires an adapter for the USB port.
3- What is the expected lifespan of this autopress?
This Cricut Autopress is tested rigorously for durability, and it is tested to last 5 years with steady use.
In conclusion, the Cricut Autopress is a great tool for crafters of all levels of experience. Whether you are a beginner looking to save time or an experienced crafter who wants to speed up your printing process, Autopress can help you get the job done faster. Even though it costs more than other Cricut machines, it designs your projects faster. So if you’re looking to complete more projects in a shorter amount of time, the Autopress is definitely worth considering! Thanks for picking out our article; Cricut Autopress Review: How To Use The Cricut Autopress: Easy Guide! We hope you will find the information useful.
Final Thoughts
Best deals On Amazon
VEVOR 12 x 15 inch Heat Press Machine

Cricut Easy Press 2

TUSY 15 x 15 Inch Heat Press Machine

I specialize in writing tech-based product reviews for over 3 years now. My blogs aim to provide well-researched and informative content to help people make informed purchasing decisions.
