
How To Cut Everything on One Mat Cricut – Step by Step Tutorial
In this article, we will show you How to cut everything on one mat Cricut in order to save time when creating your next project.
If you have a lot of colors in your design, this should save you some time compared to cutting each of them out separately. The method which will be discussed in this article can be used not only to cut HTV but also to cut:
- adhesive vinyl
- cardstock
- paper
It is advisable to use the same type and brand of materials for all the colors, rather than different weights, thicknesses, and textures!
Here Are The 5 Best Selling Cricut Mats & Cricut Bundles This Year!
| Products | Rating | Price |
| Cricut Maker Bundle | 9.9/10 [Editor's Choice] | Check Price |
| AIRCUT Cutting Mat for Cricut Maker | 9.8/10 | Check Price |
| Cricut Variety Pack | 9.9/10 | Check Price |
| Xinart Cutting Mat for Cricut Maker | 9.8/10 | Check Price |
| DOOHALO Cutting Mat for Cricut Maker | 9.8/10 | Check Price |
Single-Layered Designs
If you want to cut a single-layered design in more than one color, you can do so by using the Cricut contour tool.
Alternatively, you can cut your design exactly as it is as a welded image, and then just position your material colors in the right place on the mat (although this requires some extra precision, and is only suitable for simple designs).
Multi-Layered Designs
A multilayered design will require you to select each color and either attach it to the canvas or weld them together. Otherwise, the design or words will be mixed on the mat.
It’s important for elements you would like to cut on the same mat to be set to the same color. Otherwise, Design Space will automatically place them on different mats by default.
The design placement on the mat can be edited in the mat preview. Click and drag any part of the design around the mat to move it. When using iron-on or HTV, make sure you mirror your mat before cutting.
Cutting Out Multiple Colors At Once
Here’s a step-by-step guide for cutting out multiple colors at once with the Cricut Maker.
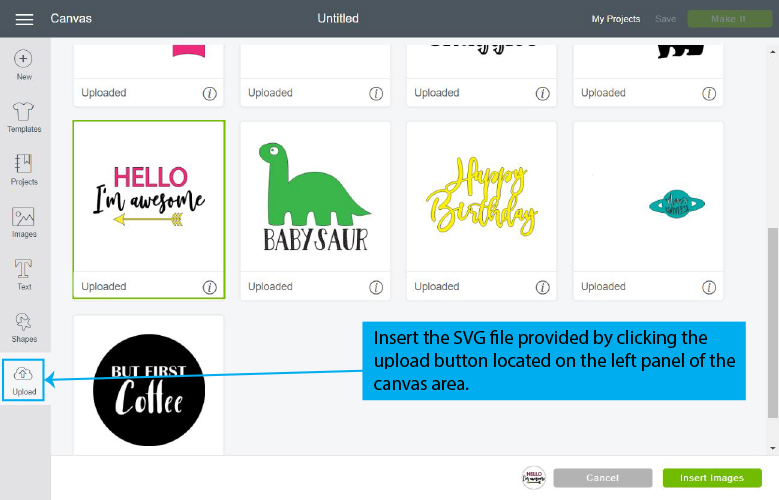
Step 1 – Upload The Design
Learning is best accomplished by following along. To prepare for this tutorial, download any Free SVG file. We are using a “Hello I’m Awesome” FREE SVG file. Save the file, then upload it to Design Space. In the canvas area, click the upload button on the left panel to upload the file. Select the image once it has been uploaded and click on ”Insert Images”.
Credit: Dreamintoreality
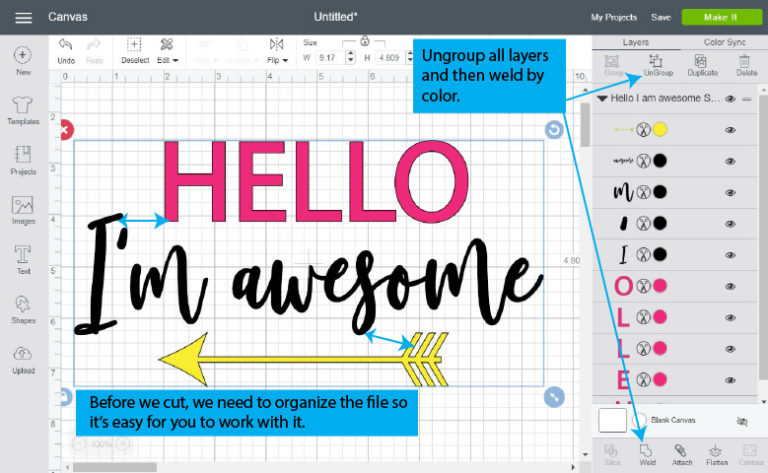
Step 2 – Organize Your Design
You need to make some adjustments to the file before you can cut it all on the same mat.
Click on the ungroup button after selecting the image. Next, select every letter that makes up “Hello” and click on weld; follow the same procedure for “I’m awesome”.
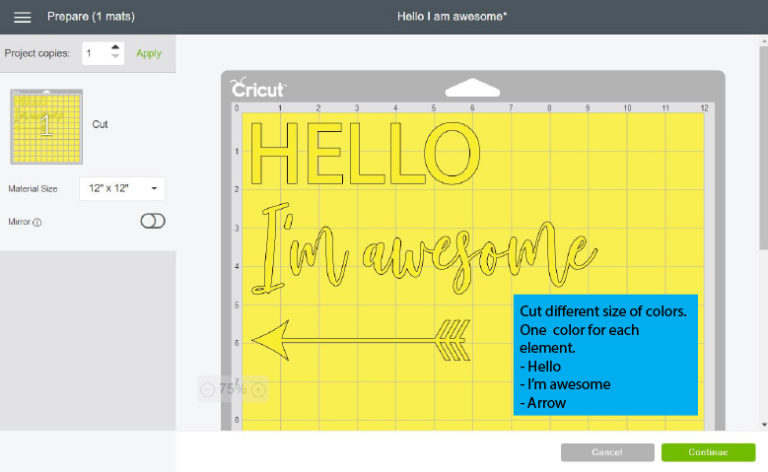
It is important to consider that the design has been set and organized the way you intend to see it in real life. You must move the elements around so that they are far apart in order to be able to cut them in different colors. In the picture below, you can see the little blue arrows inside the design.
Credit: Dreamintoreality
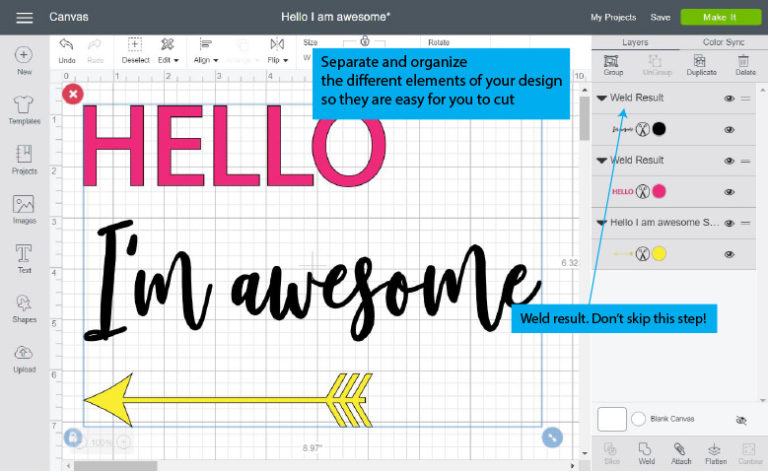
Move all three elements of the design away from each other – Hello, I’m awesome, and the arrow, so that each of the elements will have its own space.
Credit: Dreamintoreality
Each mat now represents a different color. To combine all the colors on one mat, proceed to the next step.
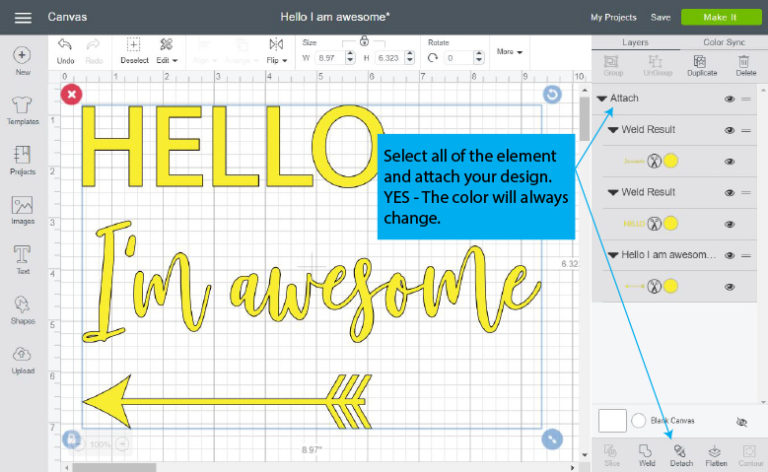
Step 3 – Attach your design and click on “Make it”
As soon as each element has been assigned a space, select them all and click “Attach’’, then click “Make it”.
When you click “attach”, you will notice all of the designs will have the same color. The number of colors dictates the number of mats, so this is always going to be the case.
Credit: Dreamintoreality
When the design is attached to the canvas, it will be held in place, and then cut exactly as shown in the display. While the placement of the design is locked into place, Design Space places it by default in the top left corner of the cutting mat. It will not be a problem most of the time, but sometimes you need to lock anything in a certain position on a mat.
- Simply select your design and manually drag it to move it to the desired position on the cutting mat.
- When you drag the design anywhere on the mat, the position will be locked and the Cricut will cut it out exactly where you placed it.
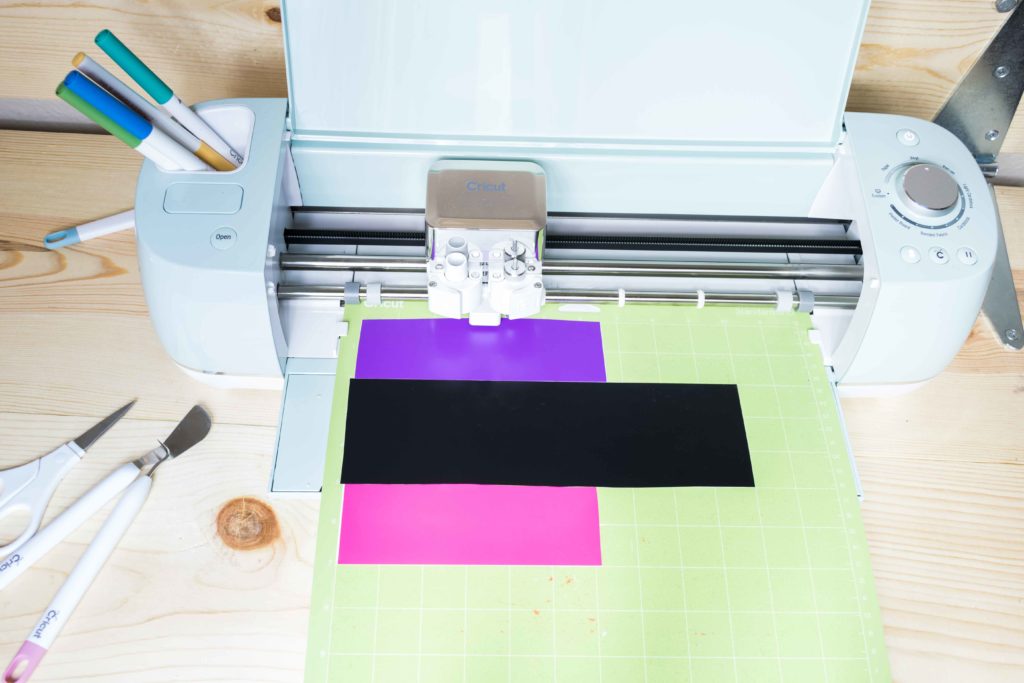
This project represents every element with three different colors. So, you need to cut three strips of the material you will be using (e.g. Vinyl). Each strip will be for a different element.
Credit: Dreamintoreality
After you have cut all the stripes of different colors, stick them to the mat, but be sure not to overlap them. After that, simply load it into Cricut Design Space or Smart Set Dial (Explore Family Machine) and press “Make it!”.
Credit: Dreamintoreality
As soon as the Cricut has finished cutting, you should weed and remove the material from the mat, then transfer it!
So there you have it, you just cut your entire project on one mat!

Credit: Dreamintoreality
How to combine mats on Cricut
You might be wondering how to combine two mats on Cricut or how to combine two projects. If you want to fit as much material as possible onto a mat in order to minimize the waste of material, this process will be most useful. Here’s how to do it:
- Step – 1: Select a design, then click Make It: Let’s take a new design to demonstrate the steps involved;
Credit: Thatswhatchesaid
- Step – 2: Choose a design you’d like to move to another mat: Choose the Mat where your design is placed. Next, choose your design. When your design is selected, a box will appear around it.
Credit: Thatswhatchesaid
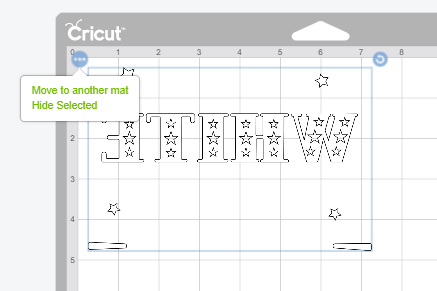
- The right corner will display a small circle with an arrow, and the left corner will display a small circle with three dots. Then, in the upper left, click the small circle with three dots. By clicking this, you’ll see two options. The first option is to “Move to another Mat” and the other option is “Hide Selected”. Now, you have to select “Move to Another Mat”.
Credit: Thatswhatchesaid
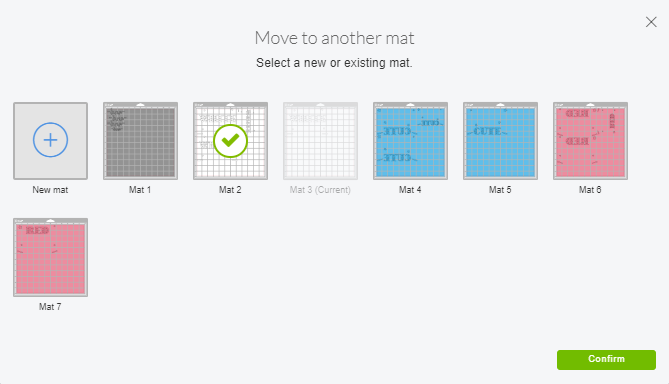
- Step – 3: Choose which mat number the design should be moved to: You’ll see an icon for each mat in the popup window. Simply select the mat to which your design should be moved and click ”Confirm”.
Credit: Thatswhatchesaid
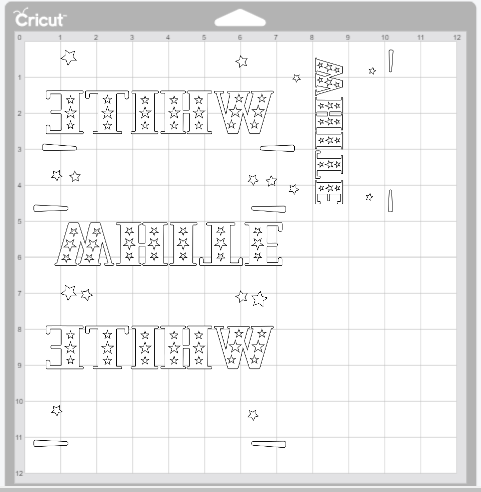
- Step – 4: Adjust location of design & Finish Cutting: Make any adjustments you need to your designs. Move the design to where you want it to be. Also, make sure the designs do not overlap. Then click ”Continue” and follow the on-screen instructions to connect a machine, choose a material, and cut your design.
Credit: Thatswhatchesaid
In this way, you will be able to combine mats on your Cricut machine.
FAQ’s
1- How do “attach” and “weld” tools differ from each other?
When you send the design to the mat for cutting, the “Attach” tool maintains the same arrangement of shapes on the mat. Even though each shape remains separate, its place on the mat is frozen. A Weld tool, on the other hand, combines two or more different shapes into a single shape.
2- How does the Cricut multi-cut function work?
When using the “multi-cut” function on Cricut, the machine repeatedly cuts the same image. This mode is recommended for materials with a thicker surface.
3- How to keep design together on Cricut?
If you would like to change the place of the design within the Cricut and lock it so that it does not overlap or move while cutting; then Simply select your design and manually drag it to move it to the desired position on the cutting mat.
When you drag the design anywhere on the mat, the position will be locked and the Cricut will cut it out exactly where you placed it.
Final Thoughts
The purpose of this article is to provide an overview of how to cut everything on one mat with the Cricut machine. Learning how to cut everything on one mat isn’t difficult but there are a lot of things to keep in mind. The more you practice, the more likely you are to remember what you learned. Furthermore, you can use a Quick Start Guide to operate the Cricut easily.
The Cricut machine is a great investment for crafters, especially those who work with paper and vinyl. Once you become comfortable using it, you will be able to create crafts much faster. It makes your cut projects look crisp and professional.
Thanks for picking out our tutorial on How To Cut Everything on One Mat Cricut – Step by Step Tutorial. Hopefully, it proves useful to you.
Best deals on Amazon
EVISWIY Variety Mats for Cricut

REALIKE Variety Cutting Mat for Cricut

KASYU Cutting Mat Standard Grip for Cricut

I specialize in writing tech-based product reviews for over 3 years now. My blogs aim to provide well-researched and informative content to help people make informed purchasing decisions.
