
How do you use Cricut Infusible Ink
Would you like to learn about Cricut Infusible Ink? In this comprehensive guide you will learn everything there is to know about Infusible Ink. You may wonder, how to create or how do I create designs with infusible ink?
This Infusible Ink tutorial explains how infusible ink works, as well as provides a list of everything you’ll need for making Infusible Ink projects. Following that, we will walk you through the process of making your first Infusible Ink project, as well as provide you with some tips and tricks.
Here Are The 5 Best Selling Infusible Ink Packs This Year!
| Products | Rating | Price |
|---|---|---|
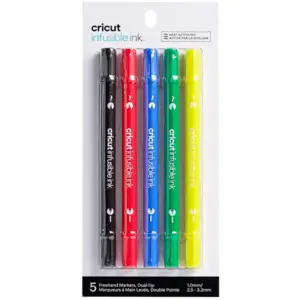
| Infusible Ink Freehand Dual Marker x 5 | 9.6 [Editors Choice] | Check Price |
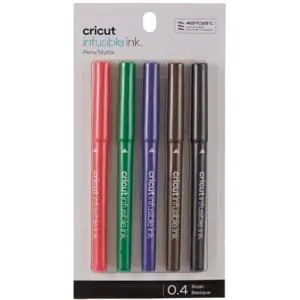
| Cricut Infusible Ink Pens, 5 x Basic Fine-Point Markers | 9.4 | Check Price |
| Cricut Infusible Ink Markers x 30 | 9.4 | Check Price |
| Cricut Infusible Ink Markers x 15 | 9.0 | Check Price |
| Cricut Infusible Ink Pen Set x 30 (0.4) | 8.8 | Check Price |
What is Infusible Ink and how does it work?
Cricut makes Infusible Ink as a special ink transfer product. The Infusible Ink comes in a variety of colors and can be used on a variety of surfaces.
In contrast with iron-on vinyl or heat-activated vinyl, which is applied over a base material using adhesives, Infusible Ink fuses directly with the material. Essentially, the design becomes part of the material – so it will not flake, peel, wrinkle, or crack if applied correctly.
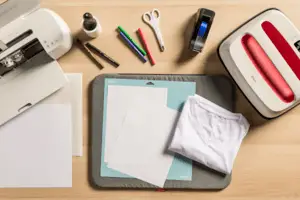
Materials Needed:
- Cricut Maker or Cricut Explore cutting machine
- LightGrip Machine Mat
- Cricut EasyPress 2 or Cricut EasyPress
- Cricut EasyPress Mat
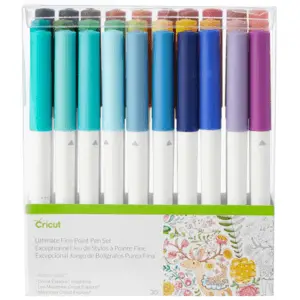
- Infusible Ink markers and pens
- Cricut apparel blank (compatible with Infusible Ink)
- Butcher paper
- White cardstock
- Heat-resistant tape
- Lint roller
- Scissors
- Tweezers
How do you use Cricut infusible ink?
Are you ready to learn how to use Cricut Infusible Ink sheets? We can get started now.
1. Select the Infusible Ink materials and a blank that is compatible with it.
Cut out designs from Infusible Ink sheets or draw your own with the Infusible Ink markers and pens.
To create a project with Infusible Ink pens, here are the steps.
- Find compatible blank material with Infusible Ink pens.
- Use laser copy paper to draw your design.
- Place the copy paper with the design on your blank, and apply heat using a Cricut EasyPress or heat press.
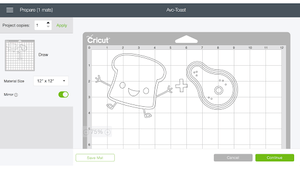
2. Design your project using Cricut Design Space.
- Start a new project in Design Space. In the Cricut Design Space screen, you can choose from the Cricut Access Library, upload an SVG cut file, or create your own design using the tools on the Canvas screen.
- When you are finished with your design, click Make It to send it to the mat.
- Then click the Mirror button on your Prepare screen.
- The Make screen contains a Materials settings section where you can select Infusible Ink. Select the fine-point blade and load it into the machine.
For more specific instructions for this step, check out our article How To Make Shirts With Cricut Maker.
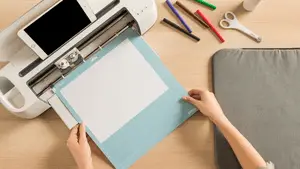
 3. Cut out the infusible ink transfer sheet
- Then, place the sheet of Infusible Ink on top of the blue LightGrip Machine cutting mat. The shiny side of the Infusible Ink transfer sheet must face down, and the colorful side should face up.
- After the cutting mat is loaded into the cutting machine, press the Load button. The cut will begin when you press the Go button.
- The mat should be unloaded after the cut is completed. To remove the cutting mat from the Infusible Ink sheet, flip the mat onto a clean work surface.
- Next, weed the design. For best results, wrap the transfer sheet around itself several times to loosen the cut pieces. As the pieces separate, you might hear crackling sounds. Don’t worry, it’s a good sign.
- After that, remove the excess transfer sheet with your fingers. To avoid getting any oils or lotions onto the transfer sheet, make sure you clean and dry your hands before you begin. You will need to weed until you are left with just your design on the clear liner.
When it comes to weeding Infusible Ink sheets, it can be more challenging than when weeding vinyl. Using your fingertips to weed the transfer sheets is recommended by Cricut because sharp seeking hooks can scratch the sheet and cause unwanted ink transfer. However, if you choose to use a tweezer, just be careful not to scratch the plastic backing or the surface of the transfer sheet.Put together your materials
4. Get your workspace ready before you apply the transfer sheet.
- You will need a flat, stable work surface to put your EasyPress mat on. On top of the mat, place your blank apparel (e.g., a T-shirt).
- After that, place the white cardstock inside the blank project. Your mat and your project need the cardstock to prevent ink bleed-through.
- Clean the surface of your project with a lint roller to remove any fuzz or fibers. Be sure not to miss this step! Even if you can’t see any fibers, there may still be a few tiny fibers preventing satisfactory ink transfer.
- Place a piece of butcher paper over the blank. You will want to ensure the butcher paper is larger than the design and the EasyPress plate.
- The Cricut EasyPress 2 needs to be preheated for 15 seconds at 385°F (195°C). Blanks should be preheated to remove wrinkles and moisture that may interfere with the transfer process. You should refer to the Cricut Heat Guide for the appropriate temperatures and times for your project.
- Let the blank cool completely after removing the heat press and butcher paper.


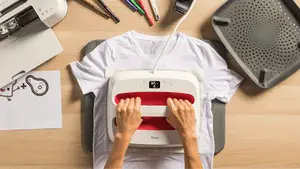
Step 5. Apply the Infusible Ink
Following the preparation of your materials, now you can apply the Infusible Ink.
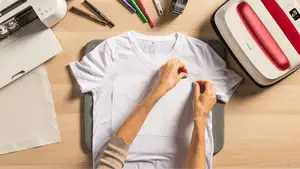
- Put the cut and weeded design face down on the blank. It will have a colorful side facing down and a clear liner facing up.
- Apply heat-resistant tape to each corner of the design. It prevents the design from moving during transfer.
- On top of your design, place a clean piece of butcher paper. It is important that the butcher paper covers the design completely and is larger than the EasyPress heat plate.
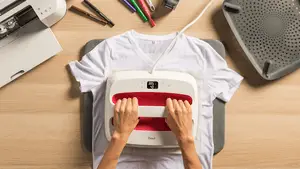
- Using the Cricut Easy Press 2, use light pressure for 40 seconds at 385°F (195°C). Refer to the Cricut EasyPress Heat Transfer Guide for the original Cricut EasyPress settings.
- Remove the press carefully so that the transfer sheet under it doesn’t move. Allow the project to cool.
- Once the project is cool, gently remove the butcher paper and then the transfer sheet. There is no problem if the paper layer separates from the clear liner. Use tweezers to carefully remove it without shifting or sliding it around.


There you have it, you have completed an Infusible Ink project!
If you followed this guide thoroughly, the ink will be permanently transferred to the project. Congrats!

How to do infusible ink: Step by step video
FAQ’s
1- How do you use Cricut infusible ink on coffee mugs?
If you use the right kind of ink, infusible ink can be used on mugs. To use Infusible Ink, you must use a mug designed for sublimation (Sublimation is the process of a substance going from a solid to a gas state, without passing through a liquid state). These mugs have been coated with a special coating. It is made using a chemical sublimation process in which solid ink on a transfer sheet becomes a gas without going through a liquid stage. As the solid ink dissolves in a gas, it is absorbed by the base material, becomes one with the base material, and then dries back into a solid.
2- What kinds of fabrics work with Cricut infusible ink?
Polyester is the only substrate to which the infusible ink or sublimation process binds. The best way to ensure long-lasting results is to use a 100% polyester blank. It is not possible to use Infusible Ink on 100% cotton shirts. Also, you can use a fabric such as 80 percent polyester and 20 percent cotton.
3- How do you use infusible ink if the image transfers unevenly?
In this case, uneven heating of the transfer sheet caused parts of the image to fade. It may not be possible for the EasyPress to make full, complete contact with the transfer sheet if there are lumps or bumps in the material or pressing surfaces – such as wrinkles, seams, buttons, and zippers. Here are some tips to ensure smooth image transfer:
- You should ensure that the pressing surface is smooth and flat.
- Remove wrinkles from your fabric by preheating it.
- It is important to avoid overlapping seams or zippers when you are doing your image transfer.
In this way, the image transfer process will be smooth and successful.
Final Thoughts
According to the article title, this tutorial is all about infusible ink – what exactly it is, and how you can use it to make beautiful projects. When crafting with this type of ink, it is very important to use materials that are compatible with the ink. The image you will make will be permanent unless you take additional steps to remove the ink.
For those who are not familiar with Infusible Ink and wanted to know more about this, we hope you might have found this post to be very helpful.
Thanks for picking out our tutorial on How do you use Cricut Infusible Ink and hope you have great success with it.
Best deals on Amazon
Infusible Ink Freehand Dual Marker x 5
Cricut Infusible Ink Pens, 5 x Basic Fine-Point Markers (0.4)
Cricut Infusible Ink Markers x 30

Cricut Infusible Ink Markers x 15

Cricut Infusible Ink Pen Set x 30 (0.4)
Arts and crafts nut that spends my spare time making cool things out of plain things!
